It might be interesting to create a VLAN to isolate one or more VMs in a network.
In Proxmox, click on your hypervisor, then on network, and create a new Linux Bridge interface.
Check the VLAN aware box.
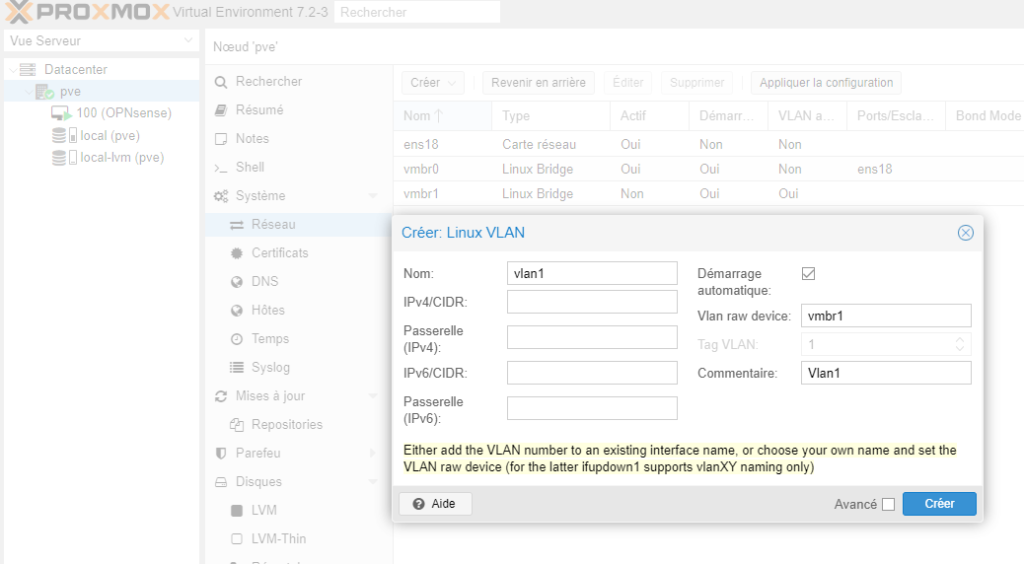
Now, in the same location, create a Linux VLAN.
Name it vlanX where X will be the number of your VLAN, which you can confirm in the grayed-out VLAN Tag section in the same window.
Under VLAN raw device, enter the name of the bridge we just created earlier.
No need to complete the IPv4 and v6 sections.
We will now create a new network card pointing to the VLAN Bridge, in this case, vmbr1.
In your OPNsense VM’s Hardware configuration, add this network card.
No VLAN tag needs to be added here.
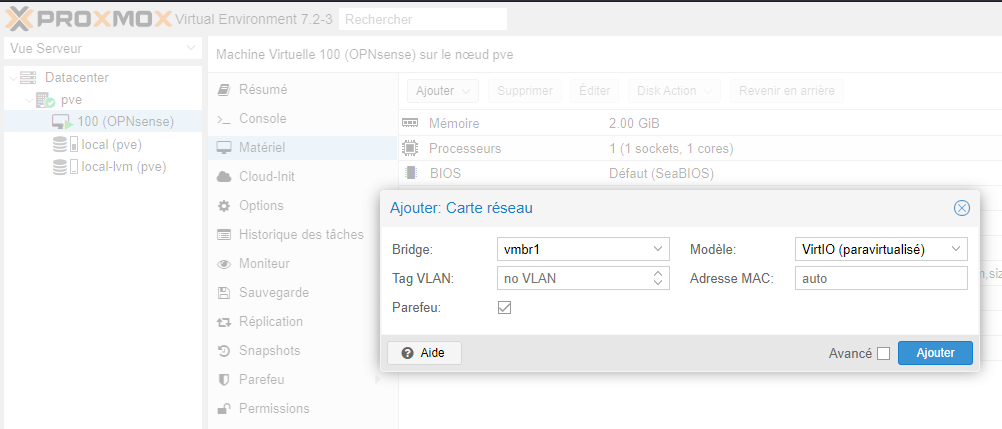
Normally, you should now have at least 3 cards on your OPNsense VM.
A WAN, a LAN, and the last one we just created for the VLANs.
To finalize the configuration, you’ll need to restart your Proxmox server.
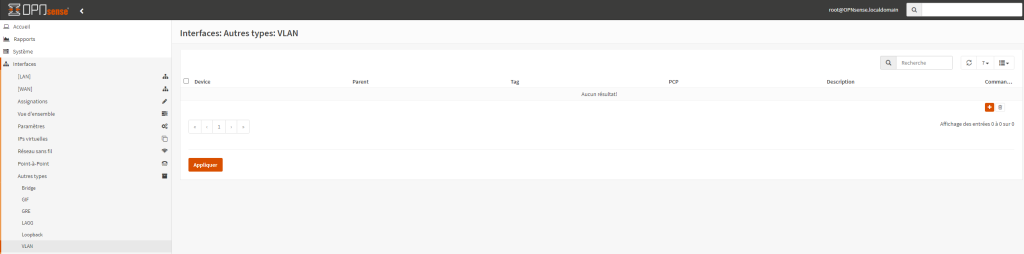
On OPNsense, click on Interface, Other Types, and VLAN.
Then click on the + on the right to add a new VLAN interface.
In Parent, choose the interface that matches the one you created on the VM.
Set the VLAN Tag according to the tag of the Linux VLAN interface created on Proxmox.
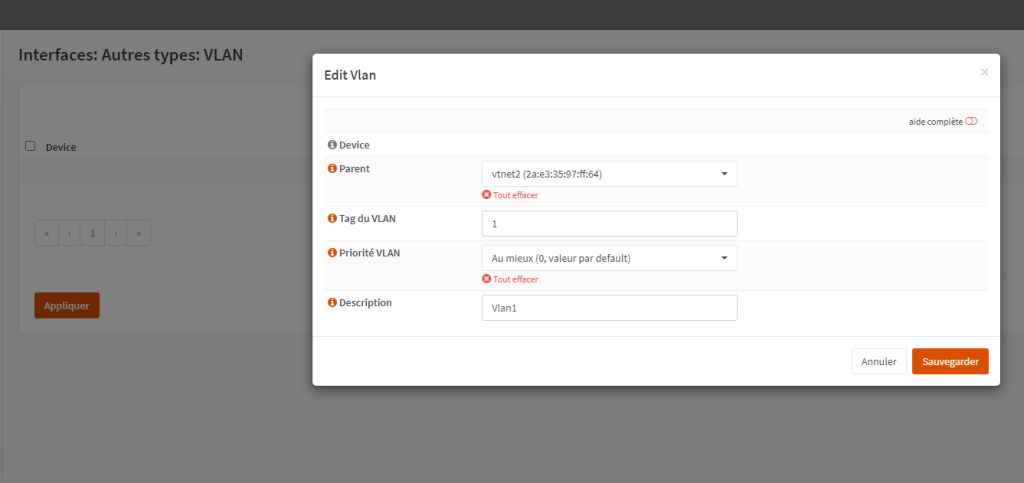
Click on Save and then on Apply.
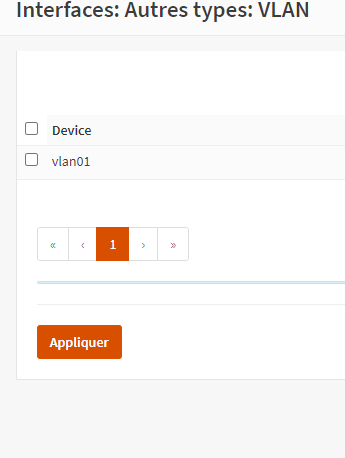
Go to Interfaces, Assignments.
Select the new VLAN interface and click on the + to add it and then on Save.
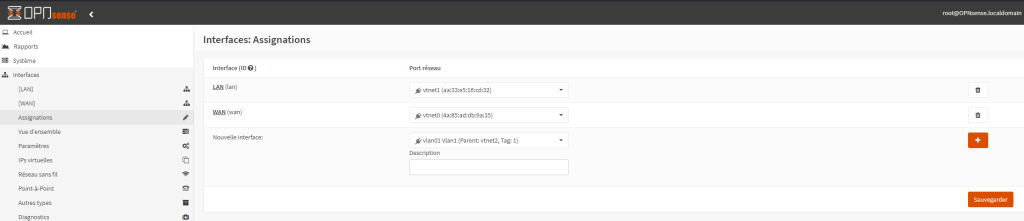
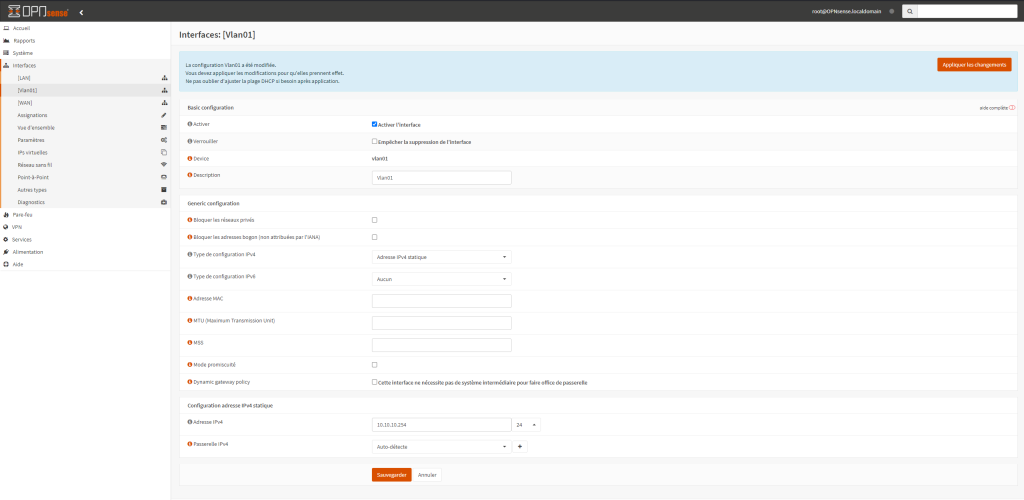
The interface should have just appeared on the left. Here it’s labeled OPT1 which we will rename to Vlan01.
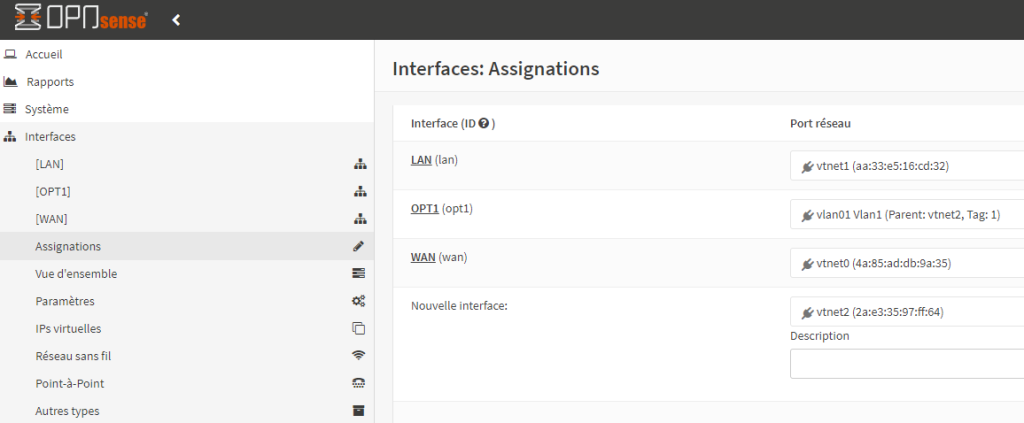
Click on OPT1 on the left under Interfaces.
Tick the box for Enable interface, add a description to rename it, for IPv4 Configuration Type choose Static IPv4 address, and at the bottom in IPv4 Address enter the address you want to assign to your interface. Don’t forget to change the network mask to /24 which defaults to /32. Then click on Save and on Apply Changes.
Your Vlan is now ready to use; remember to set up the firewall rules appropriately.
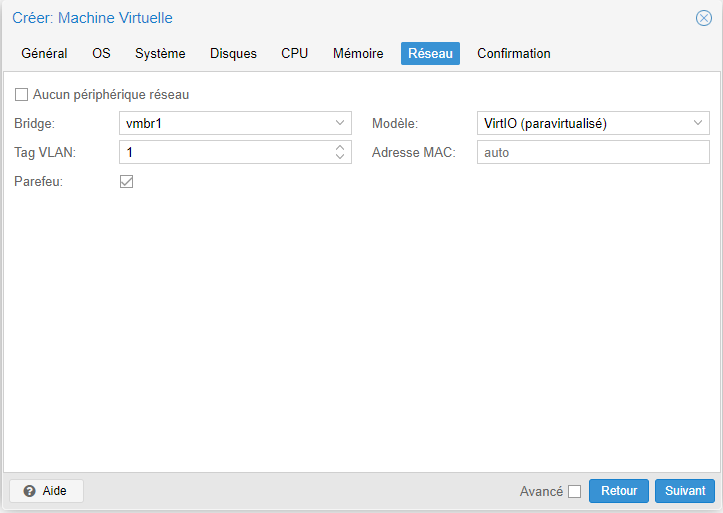
To add a VM to this Vlan, during creation in Proxmox, you will need to select the Bridge to which the Vlan is attached and fill in the VLAN Tag correctly.
Remember that the default gateway for this VM will be the IPv4 address shown in the previous screenshot.
Here it’s 10.10.10.254 /24.